Inspect your vehicle on regular basis. A well-maintained car can command a much higher value in the resale market than a car that has been neglected.
Preventative Maintenance
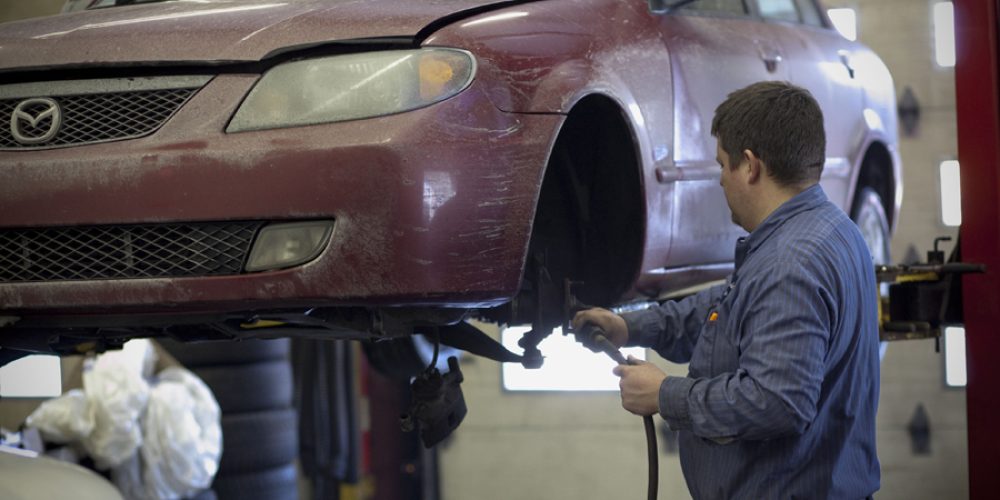
Don’t brake in a pothole!
Don’t brake in a pothole! The impact When a wheel hits a pothole, it falls into the hole and has to emerge. It is rare that the entry that causes the damage; rather it is the exit. The amount of damage depends on the diameter of the tire, the depth and length of the pothole and the speed of the vehicle. When a wheel passes over a road’s contours, most of the force exercised on the suspension is directed upward because the contact is made with the bottom of the tire. The higher up the tire the impact, the more the force of the impact tends to push the wheel both backward and upward. The smaller the diameter of the wheel, the more severe the impact, especially if the depth of the hole is the same as the diameter of the wheel. Longer potholes cause more damage because their length means that at practically any speed, the tire risks hitting its bottom before being able to emerge. Similarly, low speed can result in damage to the vehicle’s frame or platform because, here again, the tire has time to hit the bottom of the hole. The consequences When a tire hits the inside of a pothole, it is pushed both backward and upward, which transmits the shock to the wheel, the suspension and the steering. The most likely results of a severe impact with a pothole are one or more of the following: loss of a hubcap, a damaged tire, a bent or broken wheel, a wheel knocked out of alignment, damaged suspension, bent steering parts, damaged shock absorbers. Hub cap: Because hub caps are often attached to wheels only by pressure clamps, they are easy to lose and can cost $20 to $150 each to replace. Tire: The tire is the first to absorb the impact, and this can break its interior structure and/or tear its sidewall. Overinflation increases the risk of structural damage to a tire, whereas an underinflated tire can be broken by being squeezed between the pothole and the wheel. A new tire can cost anywhere from $70 to more than $400. Low-profile tires — with which manufacturers are increasingly equipping new cars these days — can be severely damaged by such an impact. If you have any doubts following a collision with a pothole, it would be wise to have your tire examined by a specialist, who will be able to detect a possible broken tire belt, which could pose a serious safety hazard. Wheel: It the tire does not absorb the entire shock because, for example, it is underinflated, the wheel will suffer the consequences. It may bend, crack, or break as a result of the impact and there is little likelihood of it being repairable. Thus, more often than not, it must be replaced. Of course, alloy wheels are both more fragile and more expensive. While a new steel wheel may cost $40 to $200, an alloy wheel can cost $500 and up. Suspension and alignment: A wheel that falls into a pothole is subject to both vertical and horizontal force. These are transmitted to the suspension, whose normal movement is vertical. If the horizontal force is significant, the suspension parts, such as the suspension arm, and steering parts, including the steering linkage, can be damaged and the wheels can be knocked out of alignment. Replacing a steering linkage can cost between $75 and $250, depending on the make of car, while a suspension arm can lighten your wallet by $150 to more than $350. If the wheels are not realigned, tires can wear quickly and the vehicle’s handling may deteriorate noticeably. A wheel alignment can cost $50 to $150, depending on the sophistication of the steering system and the amount of damage. Fortunately, shock absorbers are rarely broken by a collision with a pothole. The more likely result of constant driving on bad roads is shortened shock absorber life. There are ways to tell if a shock absorber is reaching the end of its useful life span. While oil leaking from a shock absorber is a bad sign, it does not necessarily mean it’s the end; a shock absorber can still last a long time. The reverse is also true, however: just because a shock absorber isn’t leaking at all does not necessarily mean it shouldn’t be replaced soon. The best way to check is to push down hard two or three times on a corner of the vehicle, then let go when the car is at its lowest point. If the car bounces twice or more, it is time to change that shock absorber. Repeat the test on all four corners of the vehicle. It is possible that the pair of shocks on the same axle will have to be replaced at once. A shock absorber can cost from $50 to upwards of $500. Recourse Despite release from liability obtained by Quebec municipalities and the province’s Ministry of Transport in 1993, it is still possible to receive compensation in the event your vehicle incurs damage. See our automotive tip on pothole damage in Claims and Compensation. Motorists may also consult their insurance company to see if it is more advantageous to submit a claim to the company, given the deductible in their insurance policy. If you choose not to submit a claim to your insurance company, your claims history in the central claims registry, Fichier central des sinistres, should remain unchanged. A word of advice If you can’t possibly avoid a pothole, at least avoid braking suddenly; instead, allow the wheel to roll freely into the hole. In fact, a blocked wheel is likely to sustain much more damage than a rolling wheel. Sometimes it is better just to hit the pothole than to try to avoid it by making a manoeuvre that could cause a more serious accident. And don’t try to recover a lost hubcap on a busy highway or you may be hit by a passing vehicle. If you must do so, make sure there is no danger to yourself or other road users. Finally, if you must stop to inspect damage to your car, ensure that you are parked in a safe place. https://www.caaquebec.com/nc/en/on-the-road/advice/tips-and-tricks/tip-and-trick/show/sujet/dont-brake-in-a-pothole/
Harmful odours in a new vehicle
Harmful odours in a new vehicle Two studies, one from Australia and the other from the United States, indicate that the new car smell is actually a blend of about 20 substances that may be toxic. Materials such as vinyl, plastic, leather, carpets, paint, glue, adhesives, solvents, cleaners and so on produce invisible and harmful chemical emissions. These emissions, at levels that may be 130 times normal, include benzene (carcinogenic), volatile organic compounds, toluene (a cause of central nervous system disorders) and acetone (producing irritation to mucous membranes). This chemical soup may cause discomfort, sleepiness, fatigue, headaches, confusion, and eye or nose irritation. This is why you are advised to drive with the windows down as often as possible after getting a new car, since polluting emissions may linger for six months or more. You should always let fresh air into the vehicle. Carmakers are aware of this phenomenon and some of them, especially the Japanese, are starting to build vehicles containing much less of these toxic products. © CAA-Quebec https://www.caaquebec.com/nc/en/on-the-road/advice/tips-and-tricks/tip-and-trick/show/sujet/harmful-odours-in-a-new-vehicle/

Cell phone use while driving: What you need to know
Cell phone use while driving: What you need to know On April 1, 2008, two new provisions of Quebec’s Highway Safety Code came into effect: one regarding excessive speeding and the other imposing a ban on the use of hand-held cell phones while driving. While the purpose of the former provision is quite obvious – it calls for harsher penalties for motorists stopped for driving well in excess of posted limits –, the latter may require a few clarifications. “Hands-free” only Any use of a hand-held cell phone that does not have a “hands-free” function is now prohibited while driving. Motorists were granted a three-month grace period, during which they only received a warning when arrested for this type of offence, but since July 1, 2008 they have to pay a fine of $115 (including court costs) and have three demerit points added to their driving record. The Société de l’assurance automobile du Québec also specifies that if you absolutely must use your phone, you must do so from a safe location; i.e., a parking lot, a service area, or on the side of the road as long as the speed limit is 70 km/h or less. Better yet: don’t use the phone at all CAA-Quebec reminds the public that the true danger is that while driving, the mere fact of having a phone conversation is a source of distraction. It therefore urges motorists to heed the following advice: You are better off not talking on the phone at all while driving, “hands-free” or not. When you’re on the road, turn off your handset so that any incoming calls are forwarded to your voice mail. Or, if you have a passenger, let that person make or receive calls. Be aware* Drivers who are holding a cell phone in their hand are presumed to be using it. Any device that has a telephone function, such as a wireless information device (e.g., BlackBerry), is therefore prohibited when it is held in the hand. To use a device with a telephone function, held in the hand, drivers must bring their vehicle to a stop in a location where parking is authorized. Except in an emergency situation, no one is allowed to bring a vehicle to a stop on a highway shoulder, on-ramp or off-ramp. Drivers waiting at a red light or delayed in traffic are considered to be driving their vehicle. Use of a “hands-free” cell phone is permitted. *Source: Road safety, A hand-held cell phone: Illegal!, Société de l’assurance automobile du Québec © CAA-Quebec. All rights reserved, April 2008 https://www.caaquebec.com/nc/en/on-the-road/advice/tips-and-tricks/tip-and-trick/show/sujet/cell-phone-use-while-driving-what-you-need-to-know/
So you want to sell your car yourself…
So you want to sell your car yourself… Before you set out to sell your vehicle privately, there are certain steps you would be well advised to follow—to help ascertain its value, first of all, and also to lessen the chance of problems cropping up during or after the transaction. Put together a record of the vehicle: gather all documents you have about the vehicle you are putting up for sale that might be useful to a potential buyer. These include the original sales contract, the warranty and maintenance manuals, repair bills, proof that any recalls were followed up, etc. A set of well-sorted invoices will, among other things, prove to your “customer” that your vehicle’s odometer displays the true distance travelled up to the present day. If your car has been in an accident, be up-front about it, and assemble any documents that may help you provide complete and appropriate information about it. What about getting an inspection? Excellent idea: not only will an inspection help you better inform the buyer, but it will also help you set a price that reflects the true condition of the vehicle, based on the expert opinion of a neutral third party. You can also ask your mechanic to provide a written report on your automobile, a copy of which you can provide to the buyer. A clean car is more likely to sell: take the time to buff up your vehicle to its original lustre—inside and out. Touch up the paint if necessary, get it washed and waxed, clean the rims, tires and hubcaps: whatever you can do to spruce up the car’s appearance will pay dividends! Decide on a fair price: this, of course, is a touchy issue. If you demand too high a price, you probably won’t sell the car. Go too low with your asking price, and you’ll sell—but at a loss. What to do? Start by getting an idea of what the “competition” is up to. You aren’t the only person selling a car: go through the classified ads to find out the approximate value of a vehicle in the same age and condition as yours. Next, find out the “book value” for the make, model and year of your car. If you’re a member of CAA-Quebec, you have access to a variety of trade publications that list prices. All this should give you a good idea of how much to ask. Your mechanic, who knows your vehicle well, can also give an opinion on a fair price. Remember that honesty is the best policy. When a potential buyer phones or comes to see the car, answer all questions asked of you to the best of your knowledge. Allow all prospective buyers to test-drive the car and have it inspected. Do you need a contract? Under the law, you are not required to draw up a contract of sale, but to avoid misunderstandings, “getting it in writing” is the best way to go. CAA-Quebec can provide members with standard contracts that are easy to fill in. The basic elements to be included in any contract are as follows: names and addresses of the seller and buyer; description of the vehicle (including serial number, make, model, year, etc.); warranty (if applicable); statement that the buyer has examined and/or test-driven the vehicle and/or had it inspected; known problems and/or repairs to be done soon; proof that the car has been fully paid for by the seller; whether the vehicle was involved in an accident; and so on. It’s also a good idea to specify the conditions for the buyer taking possession. To make sure the buyer doesn’t have a change of heart and decides to leave you in the lurch, ask for a down payment. Make it non-refundable, and include a provision stating that if payment has not been made in full and the transfer of ownership completed by a certain date, the sale will be null and void and you will be free to sell to another buyer. When it comes to the actual payment, you can ask that it be in the form of a fund transfer, a certified cheque or bank draft, or cash. Are you required to provide a warranty? The Consumer Protection Act does not apply to private sales; only merchants are required to declare warranties, on vehicles less than five years old and with fewer than 80,000 kilometres on the odometer. The Civil Code of Québec, however, states that the buyer must warrant to the buyer that the item sold is free of latent defects. The Civil Code defines latent defects as those that render the property for sale “unfit for the use for which it was intended or which so diminish its usefulness that the buyer would not have bought it or paid so high a price if he had been aware of them.” The warranty applies to the property sold as well as any accessories. An apparent defect is one “that can be perceived by a prudent and diligent buyer without any need of expert assistance.” What about taxes? In a private sale, only the Quebec Sales Tax is charged, and it is applied by your local office of the Société de l’assurance automobile du Québec. In other words, you are not required to collect the tax yourself. In the case of a trade-in sale at a dealership, both GST and QST will be charged, but here again, you do not have to collect these amounts yourself. © CAA-Quebec https://www.caaquebec.com/nc/en/on-the-road/advice/tips-and-tricks/tip-and-trick/show/sujet/so-you-want-to-sell-your-car-yourself/
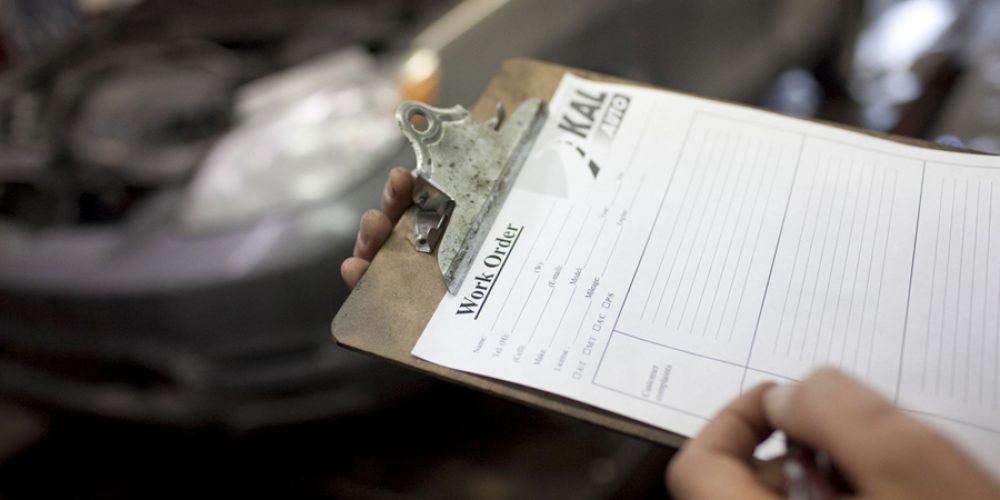
What to do in case of a breakdown
What to do in case of a breakdown If you are unlucky enough to have your vehicle break down, you need to be able to react effectively and safely. We’ve summed up the best advice for being prepared. AT ALL TIMES Forewarned is forearmed Make sure your vehicle is properly maintained. Ideally, you should also carry an emergency kit at all times—or, at the very least, a flashlight, some basic tools, bottled water, a first-aid kit and a blanket. Be able to describe where you are While driving, mentally note reference points: streets and intersections if you are in an inhabited area; on-ramp and exit numbers if you are on the highway. This information can be a big help if you have to call for roadside assistance. Remember that the navigation and location systems that come with certain vehicles may not work if you are in a remote area. Also, these systems can sometimes fail. Pay attention to your vehicle status Be alert for dashboard warning lights, unusual noises, and any change in your vehicle’s handling. Keep a close eye on the fuel and engine temperature gauges. In a breakdown, any information that you can provide will be useful for the emergency response, and will ensure that the patroller brings the appropriate equipment. IN A BREAKDOWN Pull off the road, get far away from traffic and make yourself visible Turn on your emergency flashers right away. If you can, pull over onto the shoulder, as far to the right as possible. Light emergency flares and put them behind your vehicle, if necessary. You can raise the hood or even tie a brightly coloured scarf to the antenna—the key thing is to tell others that you need assistance. If there is a danger of other vehicles colliding with yours, leave your vehicle and find a safer place; always exit by the passenger side. Otherwise, the best thing to do is remain in your vehicle with your seat belt fastened until help arrives. This last piece of advice is even more important if you find yourself in a tunnel: here again, you should pull over to the right as far as possible to wait for help. Inform authorities of your situation If you are in a dangerous situation, it is recommended that you call the police (9-1-1, or *4141 if you are on the highway) so that a patrol car can be dispatched to secure the area. Once you are in a safe place, then you can contact a roadside assistance service. Call from your vehicle if you have a mobile phone. If you don’t have access to a phone, try to flag down another vehicle. Never accept a ride from strangers, however, even if they offer to drive you to the nearest telephone. If somebody stops to help, always ask them to make the call for you. Have all the necessary information on hand to give to the dispatcher You will have to provide: your name; the vehicle make and model; your location and the type of breakdown; your licence plate number; and a phone number where you can be easily reached. If you are calling CAA-Quebec’s Emergency Road Service, have your membership card number ready. Also, find out when the tow truck will arrive. The assistance service should be able to provide you with an estimated time of arrival based on the weather conditions and the breakdown location. When the tow truck does arrive, make sure it is actually from the assistance service you called. © CAA-Quebec https://www.caaquebec.com/nc/en/on-the-road/advice/tips-and-tricks/tip-and-trick/show/sujet/what-to-do-in-case-of-a-breakdown/

Parking 101
Parking 101 Here are some tips to improve your technique and to keep your vehicle from being dinged and scratched by cars parking beside you. Do’s and don’ts If you don’t want your doors to end up lined with unsightly scratches, try (if you can) to park next to a four-door vehicle. Since their doors are shorter than those on a two-door model, there is less chance of them hitting yours. You should also be able to reduce the number of knocks and scratches on your doors by parking next to compact and sub-compact cars when you can, because they are narrower than vehicles in other categories. The best place to park is always next to the newest vehicle you can find on the lot: its owner will be taking as much care as you to prevent scratches on his or her car. Similar logic dictates that you should avoid parking next to a rust bucket, because it’s unlikely that its owner is going to be worried about his or her vehicle’s appearance—or yours. You should also try not to park behind a mini-van or truck, because it’s harder for drivers of these types of vehicle to see out the back and judge distances properly. This means they could quite easily back into your vehicle by accident. In addition, the wise driver chooses not to park in the last space at the unprotected end of a row, especially in winter, because there could be ice nearby that could cause another vehicle to skid into yours. Also, since visibility leaves much to be desired at parking lot intersections, a collision could occur, and one or more of the vehicles involved could strike yours. Therefore, unless there is a cement or metal barrier, or other type of protection at the end of the row, avoid parking in that last space at all costs. Tips for reverse 90° parking Unless prohibited from doing so, you should reverse-perpendicular park (i.e., back into the space) whenever you can. It will not only be easier for you to leave, but also to get into the spot, especially if it is narrow: backing up gives your more manoeuvrability and allows you to turn at an angle that is closer to 90 degrees, because the vehicle is pivoting around the rear wheels. To back up and straighten out, simply look at a fairly long distance out the rear window, picking a reference point in the centre of the parking space while frequently checking the space available between your vehicle and those parked on either side. Park your vehicle dead centre in the spot, parallel to the white lines. This ensures your vehicle is as far away as possible from both adjacent ones. In certain situations, reverse parking may be more difficult or more dangerous—for example, if your vehicle has a rear-end design that prevents you from accurately judging distances while backing up, or if you must cut across a driving lane. Parking on slopes Article 383 of the Highway Safety Code provides a very precise definition of how to park on a slope: “Unless otherwise indicated by the person responsible for the maintenance of the highway, a road vehicle must be parked not more than 30 centimetres from the near edge of the roadway and facing the same way as the traffic. “Where a road vehicle is parked on a slope, the emergency brake must be applied and the front wheels must be turned so that if such vehicle moves ahead of its own momentum, it will do so toward the near edge of the roadway.” Therefore, when parking on an uphill grade on a two-way street, always turn your front wheels to the left, but if you are parking uphill on the left side of a one-way street, turn them to the right. When parking on a downhill grade, do exactly the opposite. Once the wheels are properly blocked against the curb, engage the parking brake while keeping your foot on the brake pedal. Next, slowly lift your foot from the brake to allow the parking brake to immobilize the vehicle. When, and only when, you are certain that the parking brake is keeping the vehicle from rolling: if your vehicle has automatic transmission, shift to the “P” position; if your vehicle has manual transmission, shift into first gear if on an uphill grade, or shift into reverse if on a downhill grade. To leave the parking spot, repeat the steps in reverse: step on the brake pedal, disengage the parking brake, shift into gear and drive away. Parallel parking First, use your turn signal to tell others you are about to park, then stop your vehicle parallel to the one parked in front of the spot where you want to go, about a metre away from that vehicle and with your rear bumper aligned with its rear bumper. Back up while turning the steering wheel, toward the curb, depending on the speed you are going. When the vehicle reaches a 45° angle with the curb, straighten out the wheel until your vehicle’s front bumper is just past the rear bumper of the vehicle in front. Continue backing up, and turn the steering wheel away from the curb to bring your vehicle parallel to the curb. Once you are parked, straighten out the wheels, unless you are on a hill. Throughout the manoeuvre, look out the back of the vehicle, and periodically look ahead and to the sides. 30 cm from the curb A final tip. If you have enough room to drive forward into a parking space parallel to the curb—no farther than 30 cm from the curb, per the Highway Safety Code—simply aim at the curb through the farthest central point you can see on the hood of your vehicle (without changing your driving position). That point may be as close as the centre of the base of your windshield, or as far as the edge of the hood; it depends on how tall you are, and on the shape of your vehicle. © CAA-Quebec. All rights reserved. https://www.caaquebec.com/nc/en/on-the-road/advice/tips-and-tricks/tip-and-trick/show/sujet/parking-101/
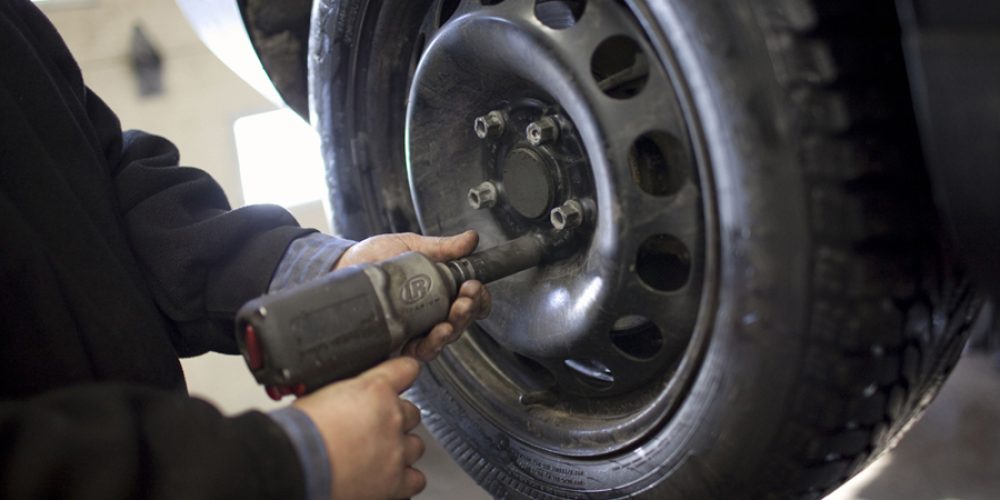
Winter driving tips
Winter driving tips In winter, the road conditions are more variable, and when they do change, it can happen much faster. It’s therefore important to adjust your driving style accordingly. You must also be ready to handle any emergency situation, and have a vehicle that’s in good condition to tackle the cold season. Get your vehicle ready Winter is always very hard on the mechanics of an automobile, and a poorly tuned vehicle may end up really costing you. If you did not take your car in during the fall, early winter is not too late for a good tune-up that includes an inspection of the fuel and exhaust systems, electrical components and ignition system, and cooling system. It’s always a good idea to have an emergency kit in your trunk in case of problems. In winter, the emergency kit needs extra equipment: shovel, snowbrush, scraper, traction aids or abrasive materials, and winter windshield wiper fluid. All of these items should be added to those you keep in your vehicle for the rest of the year. For your safety, you should always have reflective triangles or a reflective vest, a battery-free flashlight, a small tool kit, a first-aid kit, a warm blanket, and non-perishable food on board in the event of a breakdown in a remote area. Slow down As soon as you suspect that the road surface may be slippery, whether the cause is snow or ice, the golden rule is to ease up on the accelerator. By doing so, you ensure that your tires have more time to grip the road. Likewise, always turn the steering wheel slowly to maintain control of the vehicle. Practice makes perfect If you don’t feel entirely confident, you can always go for a practice session in a safe place—a large deserted parking lot, for example. Trying out a few turns, braking manoeuvres and intentional skids at a safe speed, without fear of untoward consequences, can’t hurt! What to do in case of a front-wheel skid If your front wheels start to skid—for example, when cornering—the outcome might not be serious as long as your tires start to grip the road again. But if centrifugal force is stronger than the front tires’ traction, your vehicle will start “pushing wide” of the desired trajectory. This is called understeer. This type of skid is often caused by excessive speed going into a turn, or the wheels locking up. To stop if from continuing, you must reduce pressure on the accelerator or brake pedal, and steer the wheels in the direction of the turn, while looking in the direction you want the vehicle to go. You must execute your turn gently, which will probably be easy because the wheels are already pointing in the direction you want to go. Be careful, however, when it comes to traction as well as power: if you back off the accelerator too quickly, you may find the rear wheels skidding as well. What to do in case of a rear-wheel skid Alternatively, you may notice that the rear end of your vehicle has suddenly begun assuming its own trajectory. This is called oversteer. To solve the problem, turn the front wheels in the direction in which the back end has started swinging, while, of course, looking in the direction you want to go. What often happens next is that the back end swings out again, but in the opposite direction (fishtailing). Be ready to repeat the same manoeuvre quickly, but remember to always steer gently. This is a tricky operation requiring great presence of mind: don’t forget, always look in the direction you want the vehicle to go, not the direction of the skid! Drive defensively Avoiding sudden manoeuvres and adjusting your speed to the weather conditions are the basic rules of safe winter driving. But there are also specific conditions you need to watch out for. A roadway may appear dry, but be covered in so-called black ice. This type of ice (also called clear ice) is invisible on the road surface, and it usually forms when the temperature is hovering around 0°C. Bridges, overpasses and underpasses are all areas where these nasty patches of ice can spell trouble for the inattentive motorist. If you leave the city and drive into a rural area, road conditions can change suddenly from dry to snow- or ice-covered. The careful driver therefore reduces speed in this situation, to avoid surprises caused by radically reduced tire adherence. Reaction time: your best ally! In the summer months, it is strongly recommended that you follow the “three-second rule” to keep a minimum distance between you and the vehicle ahead. But in the winter, the space between you and the vehicle in front of you should be much greater—in severe conditions, you should be able to count up to six seconds or more. The longer the following distance, the more time you will have to make the right decision in an emergency situation, and driving will also be much more pleasant because you’ll be able to better anticipate traffic flow. Think about it the next time you take to the road! © CAA-Quebec https://www.caaquebec.com/nc/en/on-the-road/advice/tips-and-tricks/tip-and-trick/show/sujet/winter-driving-tips/
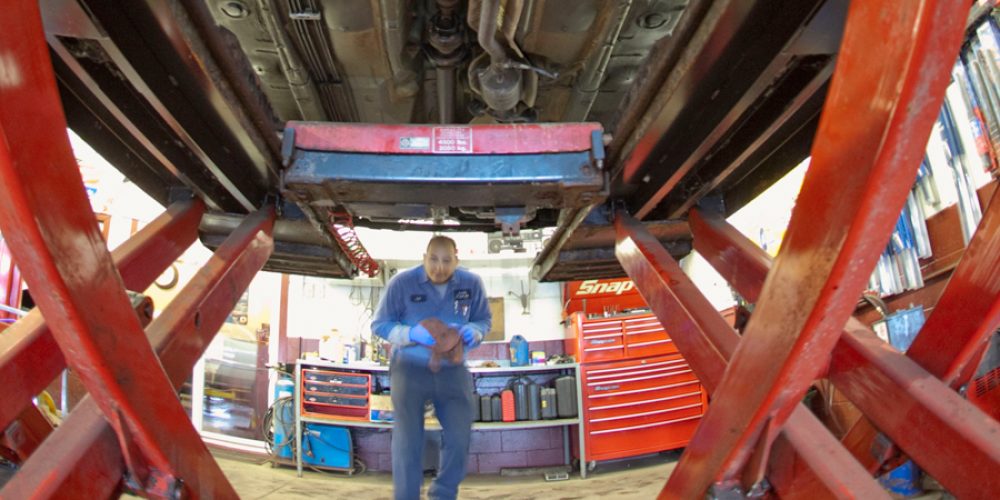
Car repair and maintenance precautions
Car repair and maintenance precautions In the good old days, a hammer and a good screwdriver were all you needed to keep your car running smoothly. Not anymore. On-board electronics have been a game changer, making even the most routine repairs and maintenance so complicated that few amateur mechanics today can handle them. But there are a few jobs you can still work on in your garage. Just be patient and take your time, because the way you used to go about them may no longer be appropriate. Automotive systems have become increasingly sophisticated and fixing them demands equally complex skills. You’ll need to consult the owner’s manual to know exactly which procedures and sequence of manoeuvres to follow for a particular job, as well as the necessary safety measures. Some things haven’t changed, however. Here’s a list of tried-and-true precautions that are still applicable today. 1. Finding what’s what and where Before going to work on your car, study the owner’s manual—a diagram will show you what and where everything is. A quick check of all the components under the hood is the least you can and should do. “People often waste a couple of hours figuring out how their new coffee maker works,” says Sylvain Légaré, automotive industry analyst with CAA-Quebec, “but they won’t even lift the hood of the car they’ve just spent thousands of dollars to buy.” Locating the battery, for example, should be done before both your hands are covered with grease. Don’t laugh: batteries used to be clearly visible, but not anymore—these days they’re more likely lurking beneath plastic covers or even under the floor of the trunk. The same goes for the different reservoirs. Look for them before, not after, you’ve poured engine oil into the antifreeze tank or brake fluid where the transmission fluid should be. And it’s a good idea to note the colour of each fluid before any of it leaks onto your driveway. 2. Caught in a heat wave Instead, wait an hour or two until the car has cooled down to its normal temperature. And when you unscrew that radiator cap, do so very slowly and turn your face away. If you need to check the engine while it’s running—so you can locate a suspicious noise, for instance—then be sure to do so in a well-ventilated area. And don’t smoke, especially if the battery is nearby. Hydrogen fumes and burning cigarettes never go well together. Avoid long or wide shirt sleeves (or at least roll them up), and tuck your tie into your shirt—better yet, don’t wear one at all. Additionally, tie back long hair and remove all jewelry. If you need light, avoid incandescents. Use LED lighting, which produces little heat and eliminates the risk of sparks with batteries nearby. 3. Stabilizing your vehicle Before leaning over the car, make sure it can’t move. The automatic transmission should be set at P (Park), the manual shift at first gear. The handbrake must be tight. To check the oil level accurately, park the car on a flat surface and wait for the engine to cool down or to be shut off for at least 15 minutes, long enough for the oil to return to the pan. An inaccurate reading may lead to adding oil unnecessarily, something you don’t want to do with today’s engines. They’re more compact and fitted with sensitive antipollution systems that can be damaged if the pan is swimming in oil. And you can be sure that the check-engine indicator will immediately light up. That’s why it’s important to pay attention to the “maximum” and “minimum” marks on the oil dipstick, so you don’t go above or below. If more oil is needed, use the kind recommended by the carmaker (it’s indicated in the manual). And of course, be sure to screw the oil cap on properly before starting the ignition. 4. General precautions Antifreeze The product must adhere to the manufacturer’s recommendations. Unless you live in Nunavut, your antifreeze should contain 50 per cent ethylene glycol and 50 per cent distilled water. When buying antifreeze, check to see if it’s premixed or 100 per cent pure, which will require some dilution—otherwise it will set like Jell-O in cold weather and won’t heat your car. Windshield washer fluid Some claim to dissolve bug crust, others to cause water to bead off. Carmakers don’t always recommend these products because they make the wipers noisier. Check the owner’s manual to learn more. Note: if you use summer washer fluid, empty the reservoir and refill it with the winter kind before the cold weather arrives. Windshield wipers If you change them yourself, follow the instructions in the owner’s manual meticulously, and remember, easy does it. “If you have to force them, then you’re not doing it properly,” says Légaré. And of course, don’t replace wipers in freezing weather—the plastic becomes brittle in the cold and could crack. Finally, make sure the blades are well secured before you hit the road. Batteries You’ve just changed your battery. If your vehicle jerks along during the first few kilometres, don’t fret. “It won’t last long,” says Légaré. “It’s because the computer controlling the transmission was reset to zero and has to readapt to your driving style.” Caution: for some vehicles, battery replacement requires that different systems—stability control, for one—be reprogrammed, a procedure that more often than not can only be performed by the dealer. Check the owner’s manual. Tires If you think changing tires is just a matter of tightening the bolts, think again. There’s a precise sequence to follow, generally in an X pattern, as indicated in the owner’s manual. Another precaution to take, which many people neglect: when you place the wheel on the hub, make sure there’s no trace of dirt or rust. “If the surfaces are not clean, you’ll risk losing a wheel,” warns Légaré. And when rotating or changing the four tires, never use the aptly named spare—it is not made for prolonged use. © CAA-Quebec https://www.caaquebec.com/nc/en/on-the-road/advice/tips-and-tricks/tip-and-trick/show/sujet/car-repair-and-maintenance-precautions/
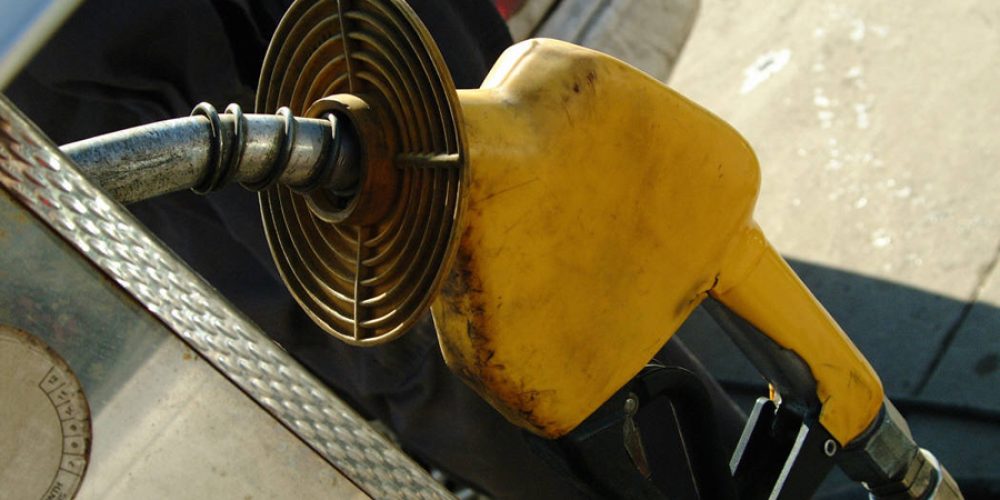
Effective ways to lower your fuel costs
Effective ways to lower your fuel costs Because rising gas prices have an immediate impact on your budget as a motorist, here is an action plan to help you lower fuel costs. Vehicle condition It is important to keep your vehicle in good condition, as a poorly tuned engine can increase fuel consumption by up to 25%. Keep tires inflated to the level recommended by the manufacturer of your car; this will conserve fuel and prolong the tires’ useful life span. Misaligned wheels can increase fuel consumption, lead to premature wear and tear of tires, and decrease the vehicle’s stability. While driving If you own more than one vehicle, make it a priority to use the most fuel-efficient one. Know before you go. Pay close attention to travel and transit reports before you leave your home or office. You might be able to choose a less congested route. When running errands, plan ahead: avoid rush hour traffic, combine errands into one trip, etc. Identify alternate routes. The shortest distance between two points may not always be a straight line. Try mapping out an alternate route. Relieve the vehicle of useless objects, which only add weight and make the engine burn more gas. Similarly, remove car top carriers or bicycle supports when they are not being used. Use a block heater. It can improve fuel consumption by up to 15%, and more, on distances not exceeding 20 kilometres. In cold weather, you need only let the engine idle for 30 seconds, then drive while avoiding heavy acceleration. Don’t let the engine idle needlessly. Once it has reached the right temperature, an engine left idling for more than 10 seconds wastes more fuel than restarting the engine. Idling can consume between 1.1 and 4 litres of gas per hour. Use the air-conditioner only when needed; in city driving, the system can increase fuel consumption by as much as 20%. On the highway, an open sunroof and an open window or windows will increase fuel consumption. Avoid revving the engine before cutting the ignition. This wastes gas and leaves fuel on the cylinder walls, which can erode the protective layer of oil and promote premature engine wear. Drive smoothly and at a constant speed. Abrupt accelerations make the engine burn more gas. Take your foot off the gas when you see traffic slowing down, and at upcoming red lights. Keep a sufficient distance between your vehicle and the one ahead so that you can accelerate gradually without closing the distance between the two cars. Brake gently and adjust yourself to surrounding traffic. Do not keep your left foot pressed to the brake pedal. This will save fuel and be easier on both the brakes and the engine. Maintain an average speed on highways. High speeds will increase fuel consumption required to combat increased resistance to air, and overly low speeds can be a danger to fellow road users. Driving at 120 km/hr as opposed to 100 km/hr can increase fuel consumption by 20%. Gassing up Many motorists are paying more for high-octane gas, when in fact it is not really necessary. Only 10% to 15% of today’s vehicles require premium fuel. Check your owner’s manual to be sure. Do not fill the tank to overflowing. At today’s prices, gas spills are costly. Get out of the habit of filling the tank to the brim. Gasoline expands in hot weather and can overflow. Fuel saversFuel savers None of the alleged “gasoline economizers” we tested lived up to their claims. At best, fuel consumption was the same as that achieved without such devices. Although automobile manufacturers may not have the monopoly on science and knowledge, they know about “fuel savers” and do not equip their vehicles with them. Yet they spend fortunes in the quest for fuel savings that translate into mere fractions of a litre. With gasoline economizers, the only way to save is to avoid buying one! Everyday choices: Have fun and get fit! Ride your bike. It’s a great way to travel as well as add exercise in your day. When shopping for your next vehicle, make fuel consumption one of the top criteria in your decision. Think about carpooling as a practical solution to and from work. If convenient, use public transit whenever you can. Move closer to your job. Many people find that, despite the cost or inconvenience involved, moving closer to work is the best solution for avoiding a frustrating commute. https://www.caaquebec.com/nc/en/on-the-road/advice/tips-and-tricks/tip-and-trick/show/sujet/effective-ways-to-lower-your-fuel-costs/
Spring cleaning for your vehicle
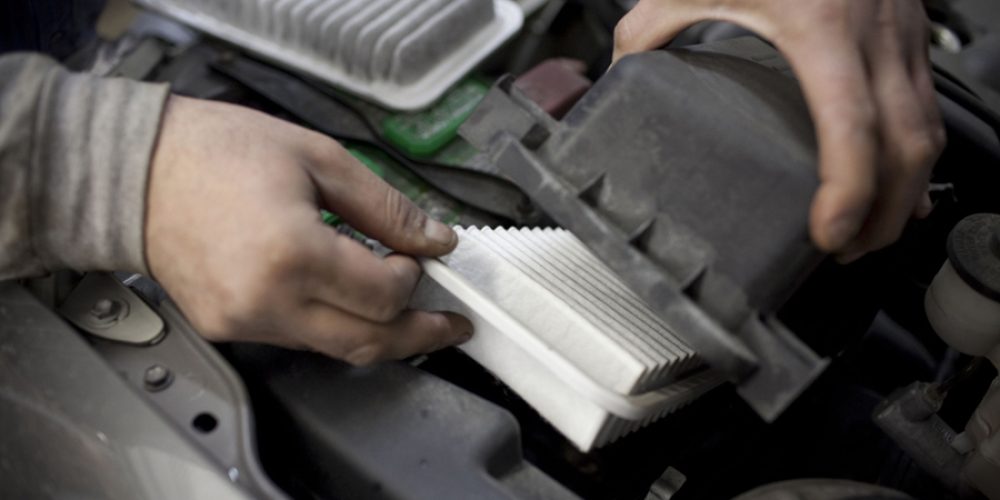
The snow has melted and the sap is running. Spring’s in the air, and you’ve been busy with the Big Cleanup. You’ve cleared the clutter and tidied up in the house, the garage, the yard… But wait! Don’t forget that your automobile needs plenty of attention in springtime as well. In Nordic countries like ours, winter is especially tough a motor vehicle. There are all sorts of vestiges of the snowy season—road salt and grit, mud and grime—that you’ll need to get rid of. Here are some overall guidelines to get your vehicle shining again for spring. Bath time! It’s a fine day out, and you can feel the warm sun on your skin. Must be the perfect time to wash the car, right? Wrong! You should wait for an overcast day, or move your vehicle into the shade. In direct sunlight, droplets of wash water act like tiny magnifying glasses and can damage your vehicle’s finish. Also, if you wash your ride after it’s been sitting in the sun for several hours, the water will dry too fast on the hot metal and tarnish the paint. You’re better off starting early in the morning, preferably in the shade of a large tree—that is, unless you go to a commercial car wash, which offers the benefit of a roof and a good high-pressure hose. The perfect car wash starts with giving the body and the wheels a serious bath. Using a garden hose, spray the body panels, moldings, inside the wheel wells and underneath the vehicle, where winter muck will have worked its way into all kinds of nooks and crannies. If mud continues to run off, keep spraying until the water runs clear. Remember, even a tiny amount of dirt that stays on your vehicle can trap moisture and become a source of rust. Once the body is wetted down properly, wash all parts of the car with a soft cloth or sponge soaked in soapy water. A few words on soap: dishwasher detergent won’t damage your vehicle’s finish, but it can leave deposits behind if you don’t rinse thoroughly. Avoid more powerful cleansers; your car’s shine will suffer. To do the job right, use a product designed specifically for car washing that is non-abrasive, won’t strip off wax, and won’t leave a greasy film. Car wash soap can be found at your favourite retailer. Always work from top to bottom, so that you don’t dirty areas that you’ve already cleaned. Clean small sections at a time and rinse often, starting with the roof, then the hood and trunk (or hatch), and finishing with the doors. Rinse the sponge frequently, in case it has picked up any fine grains of sand that could cause nasty scratches in the paint. Are really tough stains making the job a lot harder? Again, look for the right automotive product to tackle them. Or use this surefire trick from Jim Kerr, Automotive Technology Instructor at the Saskatchewan Institute of Applied Science and Technology: “Lay an old flannel sheet over the front of the vehicle, where bugs tend to get stuck, and soak it with water. The sheet holds the water on the surface, softening the deposits so they come off easier. Let it soak for a few minutes, then take the sheet off and wipe with a moist sponge.” While you wash, keep hosing down the body with water until you’re ready to dry it. You can do this last part of the work with a bunch of old bath towels, but the best thing for the job is a chamois—either a real leather one or a synthetic Absorber brand cloth. Why not let the vehicle drip-dry, you ask? Because minerals in the water could leave spots in the finish—no fun, after all that hard work you’ve just put in. Next, the more meticulous car washer will want to apply wax or sealant. This step is really worth it, not least because it’ll make the job easier next time you wash. Use a soft cloth and work small sections at a time. Don’t wax rubber trim, moldings or plastic: to restore shine to these areas, you want to use a specifically designed tire and rubber finish or plastic protectant. Take the opportunity to check for any spots where rust is creeping in, and have them taken care of as soon as possible. Finally, don’t forget to give the rubber weatherstripping on the doors and trunk a protective coating. A silicone-based lubricant will keep the rubber in good shape and prevent it from drying out during the summer—in turn, delaying the onset of chassis noise. Beauty is on the inside So now you’ve got your ride shining like new on the outside. Great! But what about the inside? From salt and gravel encrusted in the floor mats and carpeting to dust coating the dashboard and stains on the seat fabric, your vehicle’s interior needs plenty of TLC in the spring as well. Start with a good vacuuming to get the dirt out of the mats, carpeting and seat fabric. If your “dustbuster”-type hand vacuum isn’t up to the task, you can go to your local gas station where, for a few dollars, you can enjoy the power of an industrial-strength shop vacuum. Are there stubborn calcium stains on the floor mats? Declare war with a vinegar-and-water solution. It’s also a good idea to take advantage of a sunny spring day to hang the mats on the clothesline and rid them of that musty winter smell. To spruce up the dashboard, doors and leather seats, simply use a cloth soaked in hot water. Whatever you do, don’t use an ammonia-based (Windex-type) cleaner, as it could ruin plastic surfaces. For really recalcitrant stains, use detergent mixed with cold water—not hot water, which is likely to “lock” the stain in permanently. Rub gently, taking care not to discolour or harm the material. Dry gently as well, using a hair dryer on its low-temperature setting. You may think you’re done, but what about the inside of the windows? Wash them with a good car window cleaner, or a bit of vinegar. Be careful: an ammonia-based cleaner can damage tinted windows. Here’s a good window-washing trick: wipe the inside horizontally, and the outside vertically. That way, if you miss any spots or leave streaks, you’ll know which side they’re on. Now it’s time to re-tire! Obviously, your spring maintenance won’t be complete until you swap your winter tires for summer tires. Be sure to check the pressure in the new tires at the same time. We can never stress this enough: an underinflated tire will reduce fuel economy and wear out faster. For example, a tire four pounds under the recommended pressure increases fuel consumption by 2%. Clear winter clutter from the trunk Back in the fall, you packed your trunk with winter gear: bags of salt, shovel, traction aids… It’s time to take them out and lighten the load. A heavier car burns more fuel, and in turn releases more toxic emissions. So rid your trunk or cargo space of all items that won’t be of any use during the summer season. And while you’re at it, take the ski rack off the roof and store it: no need to increase wind resistance! By Nadine Filion © CAA-Quebec https://www.caaquebec.com/nc/en/on-the-road/advice/tips-and-tricks/tip-and-trick/show/sujet/spring-cleaning-for-your-vehicle/

Tire pressure
Tire pressure Incorrect tire pressure can have serious safety consequences. Under-inflated tire An under-inflated tire can result in unstable vehicle handling, and may even overheat and explode. Driving with an under-inflated tire will also reduce the tire’s life expectancy and increase the vehicle’s fuel consumption. Overinflated tires When tires are overinflated, only the centre strip of the tire meets the road surface. Since surface contact is reduced, the tire’s grip on the road is weaker. Of course this causes road handling problems—the vehicle will respond differently to direction changes and is harder to stop. As well as making driving rougher, high tire pressure causes more wear on the steering and suspension parts and cuts down on a tire’s useful lifespan. Recommended pressure CAA-Quebec therefore recommends that you check the air pressure in your tires -or have it checked- every month, and always follow the recommended pressure provided by the vehicle manufacturer. The job is easily performed with a tire pressure gauge, and takes just a few minutes. Gauges are available in any big-box store at prices varying between $5 and $40. Check the recommended tire pressure label, usually found on one of the vehicle doorframes, in the glove compartment, on the fuel tank access door or in the owner’s manual. Following the recommended pressure is important because the manufacturer of your vehicle has determined that at a given pressure—taking into account vehicle weight and other characteristics—stability, road handling, load capacity and fuel consumption will be optimal. Doing the job right Tire pressure must be checked when the tires are “cold”, that is, when the vehicle has not been driven, or has been driven only a few kilometres. An incorrect reading may result if the tires have been heated by the friction created by contact with the road surface. There should be a cap on the tire’s inflation valve. Remove it. Place the gauge on top of the valve and press firmly. If the gauge is incorrectly positioned, you will probably hear air escaping. If it is held correctly in place, you will be able to read the tire’s air pressure on the stem of the gauge (or on its display, if you are using a digital model). Check that the pressure indicated by the gauge matches the recommended pressure. If it is too low, you must inflate the tire. Use a compressor if you have one; otherwise, use a public pump, which can be found at most gas stations. If your tires are inflated with nitrogen, make sure you use nitrogen and not air (except in a emergency), otherwise you will lose the benefits that nitrogen provides. You may also find that one or more tires are over-inflated; in this case, simply use the appropriate device on the gauge, usually a small built-in stem, to push down on the valve spring and release the surplus air. Don’t forget to also check the air pressure in your vehicle’s spare tire. © CAA-Quebec https://www.caaquebec.com/nc/en/on-the-road/advice/tips-and-tricks/tip-and-trick/show/sujet/tire-pressure/
Service Advisers at Kal Auto
Kal Abunowara
Here are just a few of the specialized certifications Kal holds:
- Carquest Technical Training - Reprogramming Strategies
- Carquest Technical Training -Vehicle Data Network Diagnosis
- Carquest CTI Specialized Electronics Training Module I
- Automotive Electrical Systems
- Carquest Technical Institute Fault Pattern Recognition Use
- Enhanced Scan Data Analysis
- Fault Pattern Recognition use a current probe
- Advanced Diagnostic Challenge
- Carquest Advanced Mode 06
- Carquest Controller Area Network Diagnosis
- Volkswagen Next Generation Top Ten OBDII Codes and their Fixes
- Cooling System Technology
- MAF Diagnostics
- Carquest Volkswagen Audi Diagnosis
- Ride Control Modules 1-4
- Scope Diagnostics A-Z
- Emissions Modules 1-4
- Environmental Halocarbon Certification
- Worldpac Training Institute Volvo Engine Management II
- And many more!
Sean Giroux
- Carquest Hybrid Generic Service
- Advanced Evap System Diagnosis
- Carquest Technical Training Course - Reprogramming Strategies
- Carquest Technical Training - Vehicle Data Network Diagnosis
- Ride Control Modules 1-4
- Enhanced Scan Data Analysis
- Fault Pattern Recognition use a probe
- Fault Pattern Recognition OBD II no-start diagnosis
- Carquest Technical Institute Advanced Mode 06
- Carquest Controller Area Network Diagnosis
- Carquest Volkswagen Audi Diagnosis
- Environmental Halocarbon Certification
- And many more!
WHAT SOME OF OUR CLIENTS ARE SAYING?

It is a pleasure to deal with the Kal Auto team. They provide friendly and reliable service when we need regular maintenance or repairs, and most importantly, they fix small problems on our vehicles before they become big ones!

I have used the services of Kal Auto on several occasions for regular maintenance and body repair. I have been very impressed by the quality of service, integrity and knowledge of their team. They provide reliable service in a friendly environment. I highly recommend them (they also offer great coffee while your car is being repaired!)

I just picked-up my car from Kal Auto. I will start by saying that I drive to Lle Bizard to get my car fixed, and that’s exactly 47km. The reason I do this is because of the great service and knowledge of Kal and his team. They never leave you thinking things weren’t done right or extras were added to the repair. They always advise you of what needs to be done and the exact price, and you make the decision. Passion and experience is what you will feel when you bring your car to Kal Auto. I totally appreciate that!

